Back Leg
3. Back Leg Assembly
In this step, we will assemble the back legs of the Robot Dog and mount them on the second ice cream stick servo motor horn assembly prepared earlier.
The back leg assembly works together with the front leg assembly to create the walking motion of the Robot Dog.
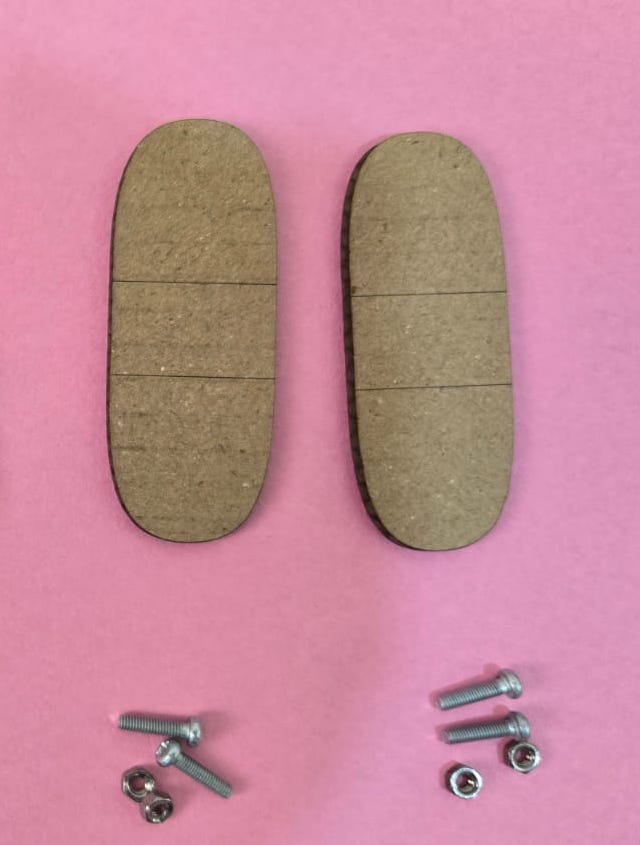
Parts Required
| Part | Quantity | Description |
|---|---|---|
| Back legs | 2 | Cardboard back leg pieces |
| Screws | 4 | Used to fix the legs to the ice cream stick / horn assembly |
| Nuts | 4 | Used to lock the screws in place |
| Servo motor horn assembly | 1 | Second servo motor horn assembly prepared using servo motor, horn, and ice cream stick |
Assembly Instructions
1. Identify the Back Legs
Take the two cardboard back leg pieces.
The back legs are similar to the front legs but will be mounted on the second servo motor assembly.
Keep both back legs in the same direction before mounting.
2. Place the Second Servo Horn Assembly
Take the second servo motor horn assembly.
Place it on the table with the ice cream stick facing horizontally.
This ice cream stick will act as the support bar for mounting both back legs.
3. Align the Back Legs
Place one back leg on the left side of the ice cream stick and the other back leg on the right side.
Make sure:
- Both legs are facing the same direction.
- The rounded ends are pointing downward.
- Both legs are parallel to each other.
- The marking lines on the two legs are aligned.
- The legs are mounted at the same height.
4. Insert the Screws
Insert the screws through the holes in the back legs and ice cream stick.
Use two screws for each.
Do not fully tighten the screws immediately. First align both legs correctly.
5. Tighten the Nuts
Once both back legs are aligned, tighten the nuts gently.
The legs should be held firmly, but they should not be crushed or bent.
Avoid overtightening because it may damage the cardboard or restrict the movement.
6. Check the following
- Both back legs move together.
- The legs do not touch the servo body.
- The ice cream stick does not bend too much.
- The screws and nuts do not block movement.
- The servo horn remains firmly attached to the servo shaft.
Back Leg Assembly Video
Important Notes
- Do not force the servo horn while checking movement.
- Make sure the back legs are not mounted upside down.
- Keep both legs at the same level.
- Do not overtighten the nuts.
- Keep the servo wire free so that it does not get pulled while walking.
Troubleshooting
| Issue | Possible Reason | Solution |
|---|---|---|
| Back legs are loose | Nuts are not tightened properly | Tighten the nuts gently |
| Legs are not aligned | Legs moved while tightening | Loosen, realign, and tighten again |
| Servo horn is not moving freely | Screws are too tight or touching the servo | Adjust the screw position and loosen slightly |
| One leg is higher than the other | Uneven mounting | Remove and mount both legs at the same height |
| Ice cream stick bends | Legs are misaligned or screws are too tight | Realign the legs and tighten evenly |
| Servo wire gets pulled | Wire is trapped or twisted | Free the servo wire before mounting to the body |
Completed Step
The back leg mechanism is now ready.
In the next step, we will check both the front leg assembly and back leg assembly together before fixing them to the Robot Dog body.