Assemble the Tail and Decorate the Robot Dog
In this step, we will attach the tail to the Robot Dog and then decorate the face creatively. This is the step that gives the Robot Dog its personality.
The tail is assembled to the slot at the back of the robot dog. After that, you can use sketch pens, markers, crayons, or colour pencils to draw the eyes, nose, mouth, ears, and other creative details.
Parts Required
| Part | Quantity | Description |
|---|---|---|
| Tail cardboard part | 1 | Cardboard tail piece of the Robot Dog |
| Colour pens / markers | As needed | Used to decorate the Robot Dog face |
| Pencil | 1 | Optional, for drawing the face outline before colouring |
| Eraser | 1 | Optional, for correcting the pencil sketch |
Tail Part
The image below shows the Robot Dog and the tail part.
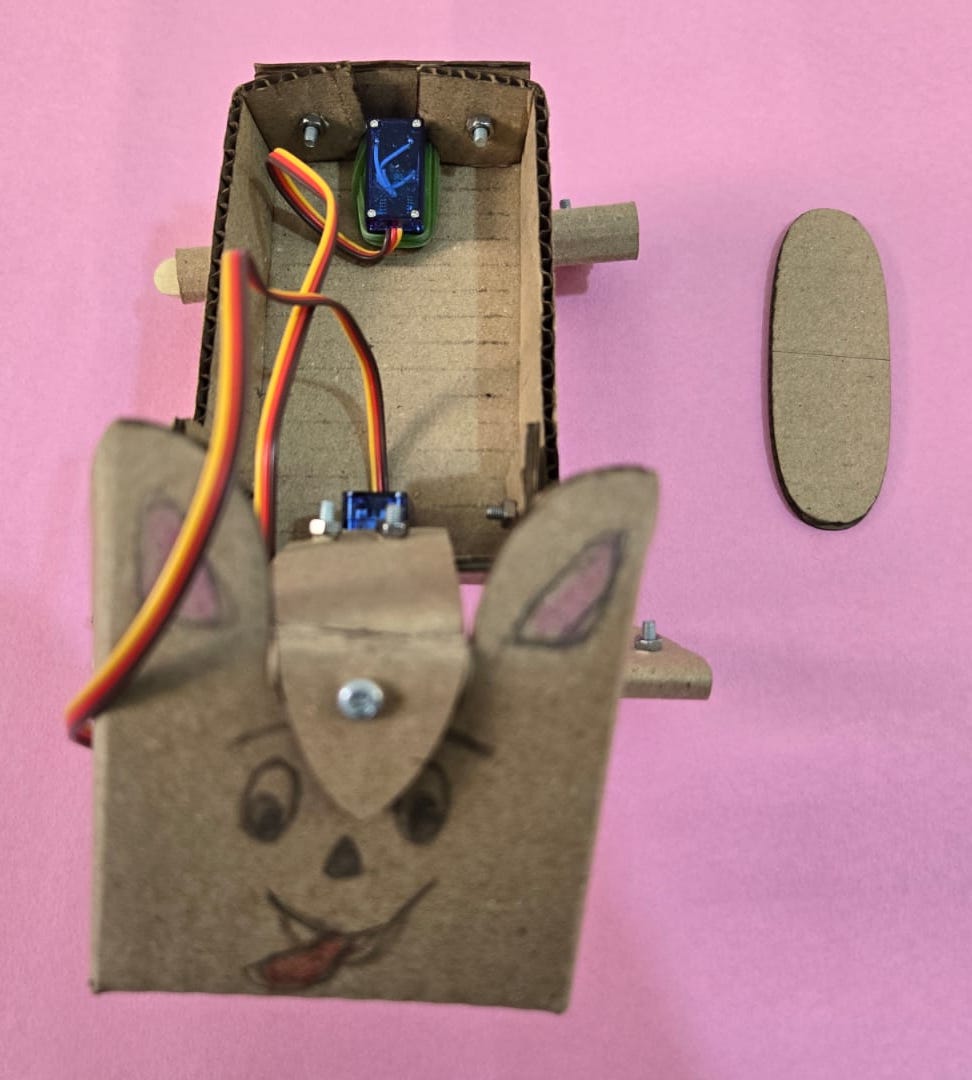
1. Identify the Tail Slot
Look at the back side of the Robot Dog. You will see a slot where the tail can be assembled.
2. Assemble the Tail
Take the cardboard tail piece and assemble it into the tail slot
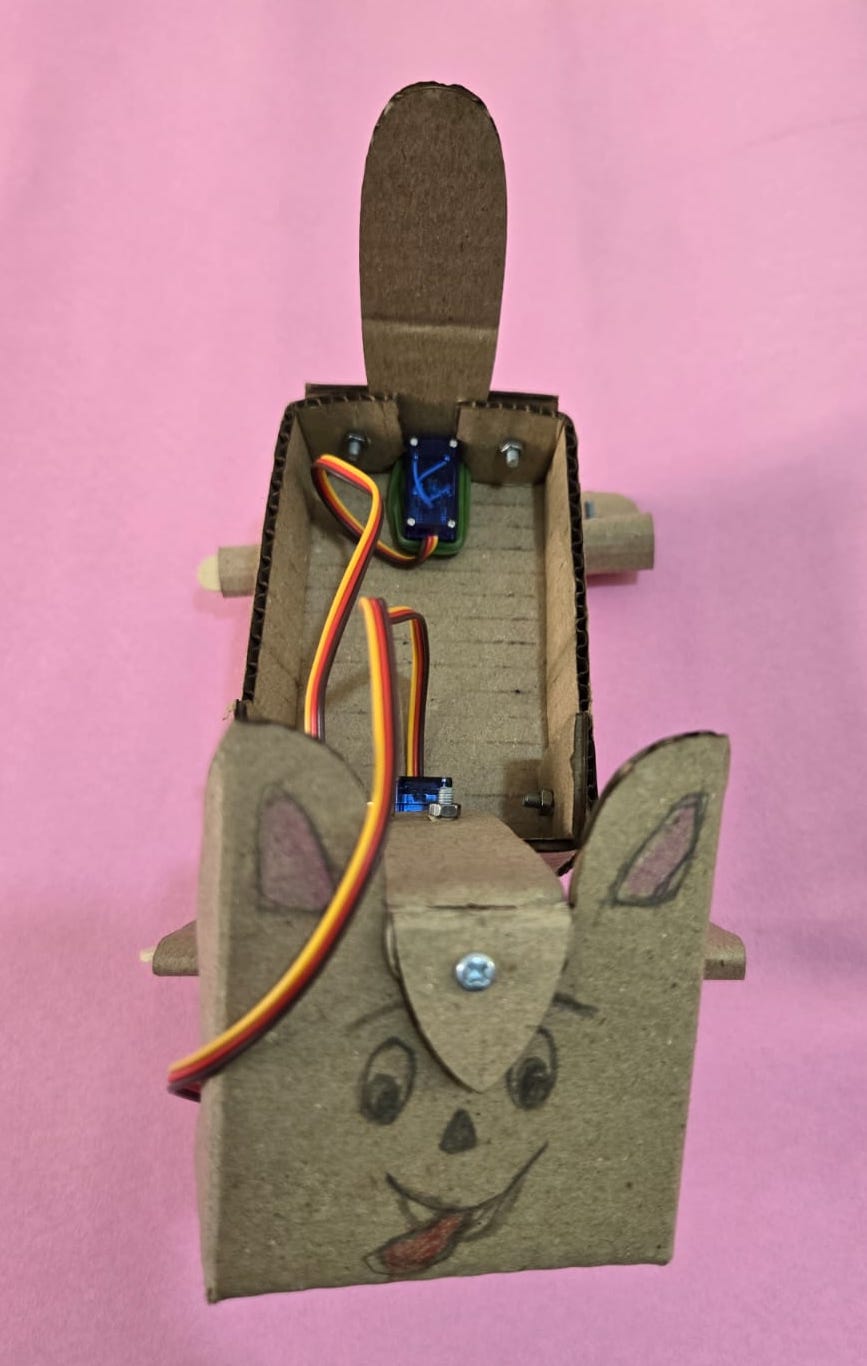
3. Adjust the Tail Position
After inserting the tail, adjust it so that it stands upright.
Tail Assembled on Robot Dog
The image below shows the tail assembled on the Robot dog.
4. Decorate the Robot Dog Face
Now bring out your creativity and decorate the Robot Dog face.
You can draw:
- Two eyes
- Nose
- Mouth
- Tongue
- Ears
- Eyebrows
- Cheeks
- Spots or patterns
- Name of your Robot Dog
Use a pencil first if you want to sketch lightly before colouring.
5. Creative Face Ideas
Here are some fun ideas:
| Style | What to Draw |
|---|---|
| Happy Puppy | Big eyes, smiling mouth, tongue sticking out |
| Super Robot Dog | Sharp eyes, lightning mark, bold outline |
| Friendly Pet | Round eyes, small nose, cute smile |
| Space Dog | Stars, antenna, space helmet style lines |
| Police Dog | Badge symbol, serious eyes, collar |
| Cartoon Dog | Large eyes, colourful ears, funny expression |
6. Colouring Tips
Use light colours first and then add darker outlines.
Suggested colours:
| Area | Suggested Colour |
|---|---|
| Eyes | Black, brown, or blue |
| Nose | Black or dark brown |
| Mouth | Black or red |
| Tongue | Red or pink |
| Ears | Brown, orange, pink, or any colour you like |
| Face outline | Black marker |
| Body patterns | Spots, stripes, or your own design |
7. Add Your Robot Dog Name
You can also give your Robot Dog a name.
Example names:
- Robo
- Bolt
- Bingo
- Spark
- Bruno
- Pixel
- Chitti
- Buddy
Write the name on the side of the body or near the head.
Troubleshooting
| Issue | Possible Reason | Solution |
|---|---|---|
| Tail is loose | Tail is not inserted fully | Push it gently into the slot |
| Tail bends | Too much force was applied | Remove and reinsert carefully |
| Tail touches servo wire | Wire is routed too close to the tail | Move the wire to the side |
| Back legs hit the tail | Tail is inserted too low or tilted | Adjust the tail position |
| Face drawing smudges | Ink has not dried | Allow the marker ink to dry fully |
Your DIY Robot Dog is ready for final assembly