Body and Legs
5. Assemble Body and legs
In this step, we will fix the front leg assembly and back leg assembly to the main body of the Robot Dog.
The body has two rectangular slots. These slots are used to position the servo motors. The rubber bands are used to hold the servo motors firmly in place on the body.
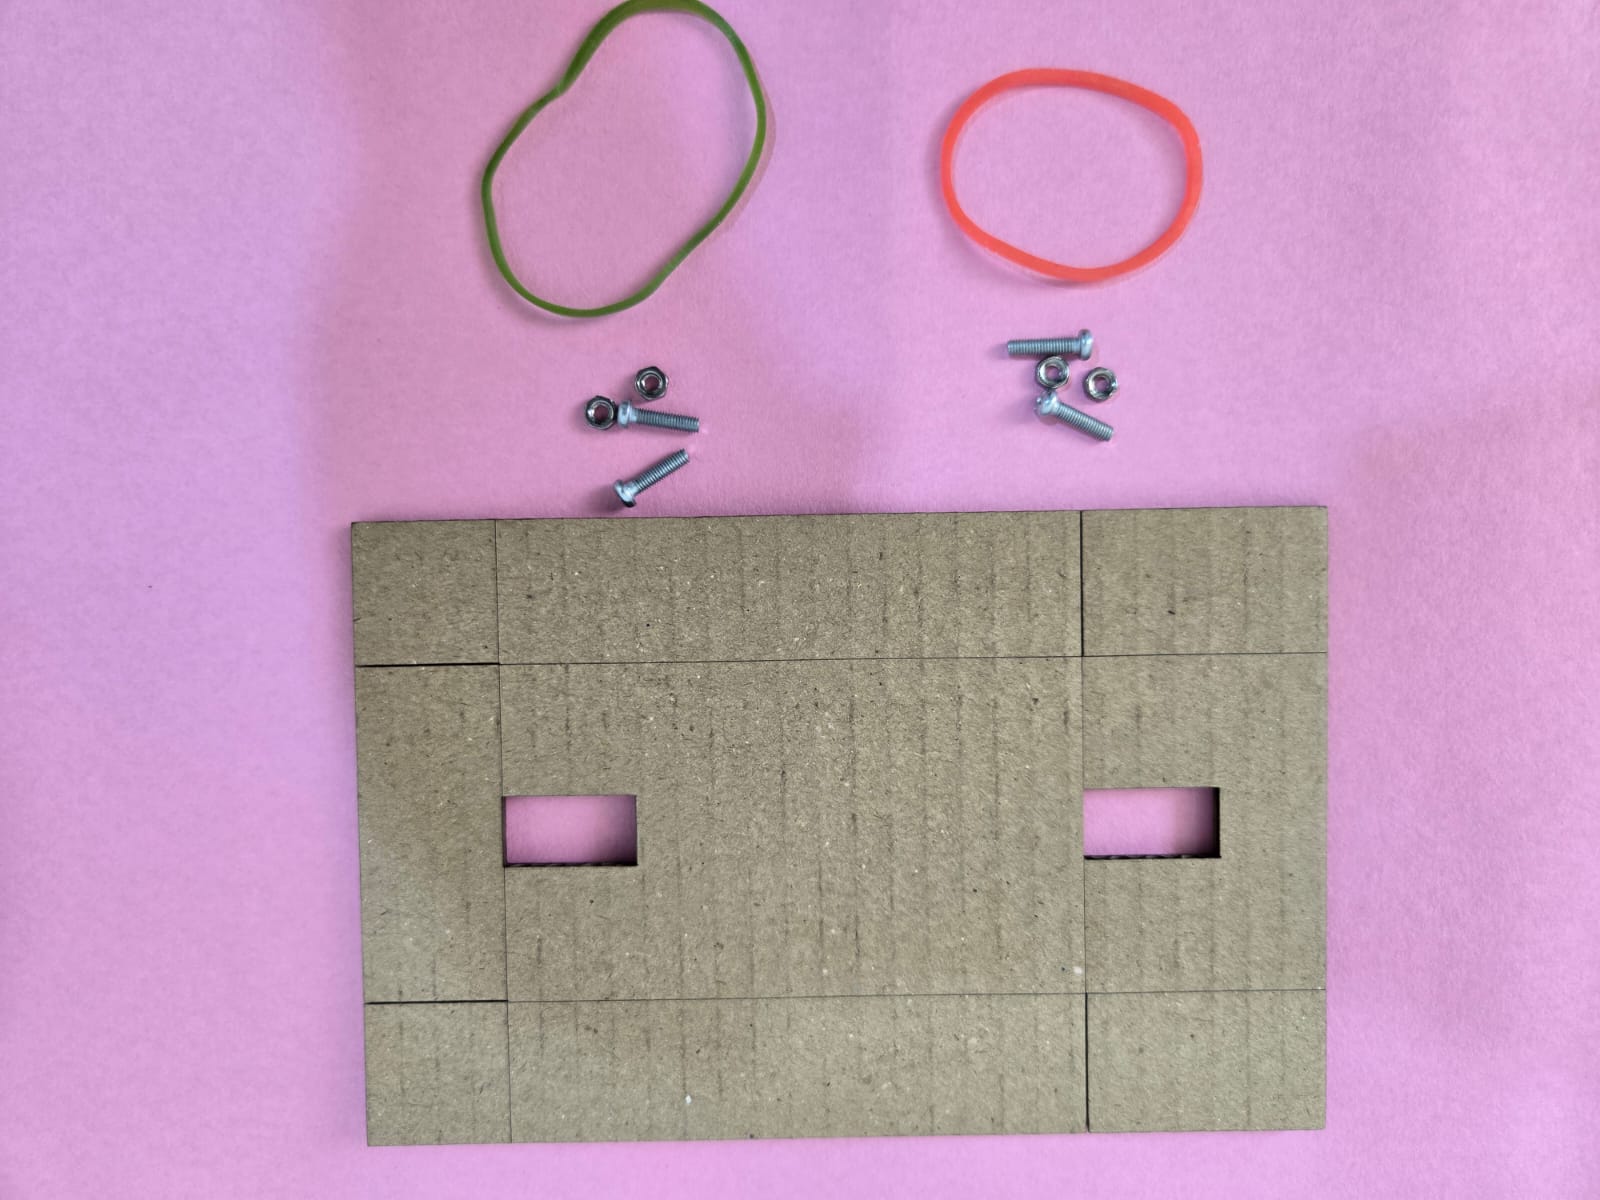
Parts Required
| Part | Quantity | Description |
|---|---|---|
| Body | 1 | Main cardboard body frame of the Robot Dog |
| Front leg assembly | 1 | Front legs mounted on servo motor horn assembly |
| Back leg assembly | 1 | Back legs mounted on servo motor horn assembly |
| Rubber bands | 2 | Used to secure the servo motors to the body |
| Screws | 4 | Used for fixing and alignment |
| Nuts | 4 | Used to lock the screws in place |
Assembly Instructions
1. Identify the Body Orientation
Place the body part flat on the table.
The two rectangular cutouts on the body are used for positioning the servo motors.
Keep the body in the correct direction before fixing the legs:
- Front leg assembly should be placed toward the front side of the Robot Dog.
- Back leg assembly should be placed toward the rear side of the Robot Dog.
- Servo wires should face upward or toward the inside of the body so they can be connected easily later.
2. Position the Front Leg Servo
Take the front leg assembly.
Place the front servo motor near the front rectangular slot on the body.
Align the servo motor so that:
- The servo shaft faces outward.
- The front legs hang downward freely.
- The legs do not touch the body.
- The servo wire remains accessible.
Do not tighten or secure it fully yet. First check the position and movement.
3. Secure the Front Servo Using Rubber Band
Use one rubber band to hold the front servo motor firmly on the body.
Pass the rubber band around the body and over the servo motor.
The rubber band should hold the servo motor tightly, but it should not press too hard on the servo wire.
Check that:
- The servo motor does not slide.
- The servo horn can still rotate.
- The front legs can move freely.
- The rubber band is not blocking the servo horn.
4. Position the Back Leg Servo
Take the back leg assembly.
Place the back servo motor near the rear rectangular slot on the body.
Align it in the same way as the front servo:
- Servo shaft should face outward.
- Back legs should hang downward.
- Servo wire should be accessible.
- The leg movement should not be blocked by the body.
5. Secure the Back Servo Using Rubber Band
Use the second rubber band to secure the back servo motor to the body.
Pass the rubber band around the body and over the servo motor.
Make sure the servo motor is held firmly in position.
Check that:
- The servo motor is not loose.
- The rubber band does not touch the moving horn.
- The back legs can move freely.
- Servo wire is not pulled or trapped.
6. Align Both Leg Assemblies
Place the Robot Dog body on a flat surface and check both leg assemblies.
Both front and back legs should:
- Touch the surface properly.
- Stand at a similar height.
- Move without hitting the body.
- Be balanced on both sides.
If the Robot Dog is tilted, loosen the rubber band slightly and adjust the servo position.
7. Tighten and Check Stability
After the position is correct, make sure the rubber bands are properly seated.
The rubber bands should keep both servo motors stable during movement.
Do not use glue at this stage. Keeping the servos secured with rubber bands makes it easy to adjust the position later if the walking motion is not correct.
8. Fold the Rectangular Cardboard Body
Fold the rectangular cardboard body along the marked fold lines to form the Robot Dog body shape.
The fold should create a firm rectangular body frame. Make sure the two rectangular servo slots remain open after folding.
9. Screw the Body in Place
After folding the rectangular cardboard body, use screws and nuts to lock the body shape.
Use:
- 2 screws in the front side of the body
- 2 screws in the back side of the body
Insert each screw through the matching holes in the folded cardboard and tighten it with a nut.
Do not overtighten the screws. The body should be firm, but the cardboard should not get crushed.
Body and Legs Assembly Video
Important Notes
- Use rubber bands to secure the servo motors instead of permanently fixing them.
- Do not overtighten the rubber bands, as this may bend the cardboard body or press the servo wires.
- Make sure the servo horns are not blocked by the rubber bands.
- Keep both servos aligned properly so the Robot Dog can walk smoothly.
- If the Robot Dog does not walk correctly later, adjust the servo position and leg alignment.
Troubleshooting
| Issue | Possible Reason | Solution |
|---|---|---|
| Servo motor moves from its position | Rubber band is loose | Reposition the rubber band and secure it firmly |
| Servo horn is blocked | Rubber band is touching the horn | Move the rubber band away from the servo horn |
| Robot Dog body tilts | Front and back servos are not aligned | Adjust the servo positions |
| Legs hit the body | Servo is placed too close to the body edge | Reposition the servo motor |
| Servo wire is tight | Wire is trapped under rubber band | Free the wire and route it properly |
| Walking motion is uneven | Leg assemblies are not balanced | Realign front and back leg assemblies |
Completed Step
The body and legs are now assembled.
In the next step, we will attach the head, neck, and tail to complete the Robot Dog structure.