Final Assembly of the Brain on to the Robot Dog
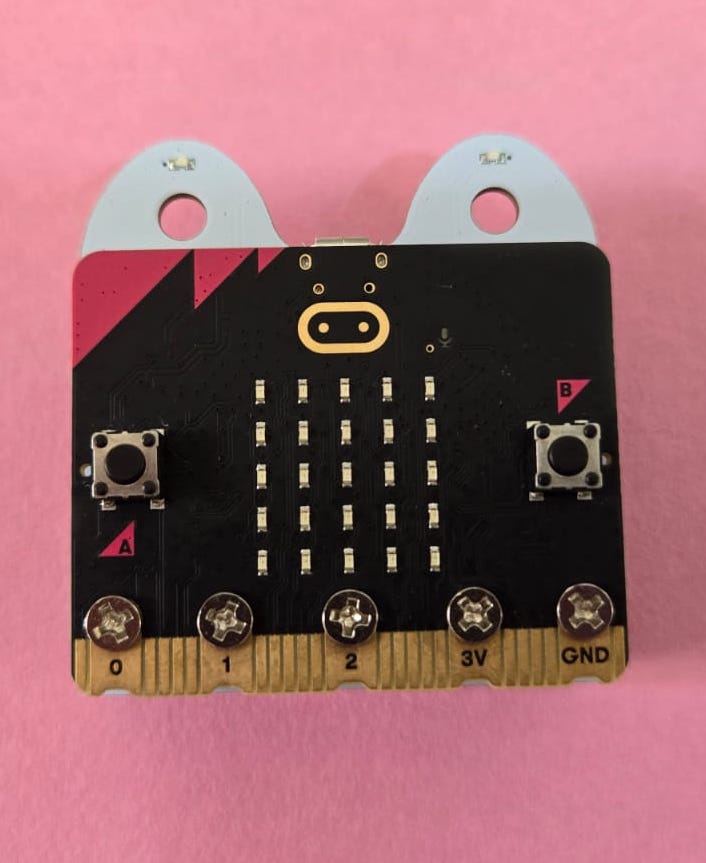
In this step, we will coneect the Brain with the servo motors and IR sensor.
The expansion board helps us connect the front leg servo, back leg servo, IR sensor, and power easily to the micro:bit.
Parts Required
| Part | Quantity | Description |
|---|---|---|
| Brain of the Robot Dog | 1 | Brain which controls the servo motors, IR sensor |
| Front leg servo motor | 1 | Servo motor connected to the front leg mechanism |
| Back leg servo motor | 1 | Servo motor connected to the back leg mechanism |
| IR sensor | 1 | Used to receive commands from the IR remote |
Brain of the Robot Dog
3. Connect the Front Leg Servo Motor
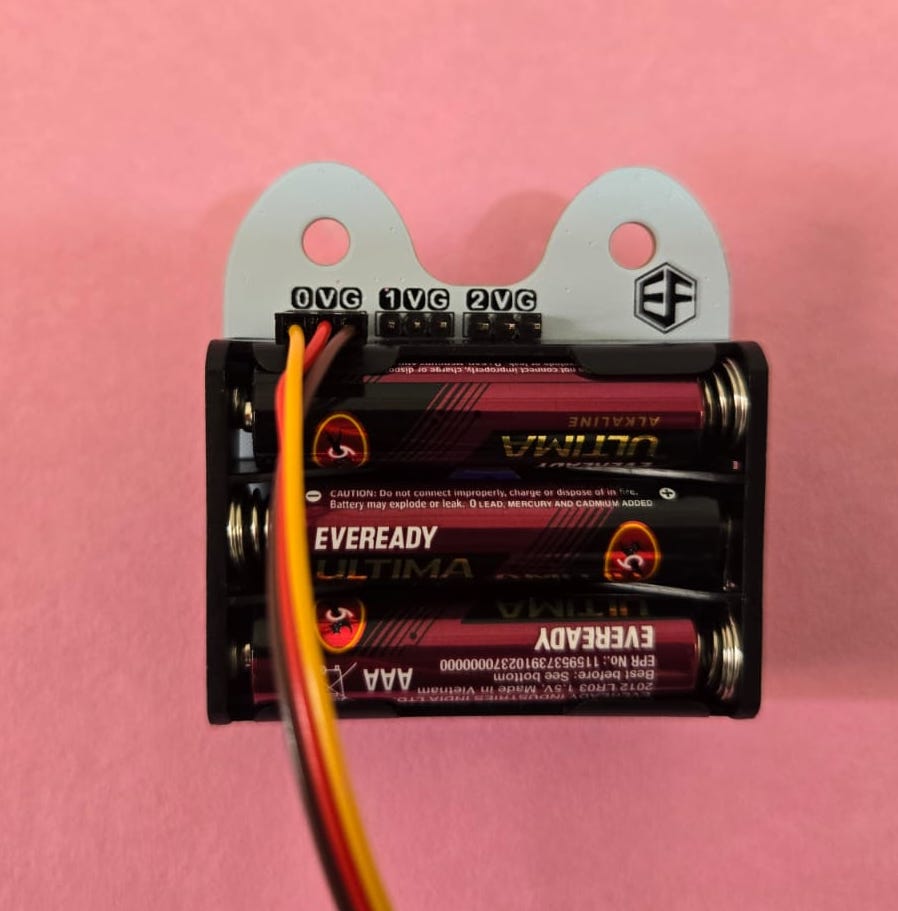
Connect the front leg servo motor to P0 on the expansion board.
Servo wire connection:
| Servo Wire | Connect To |
|---|---|
| Brown / Black | GND |
| Red | VCC |
| Orange / Yellow | P0 Signal |
Make sure the servo connector is inserted in the correct direction.
4. Connect the Back Leg Servo Motor
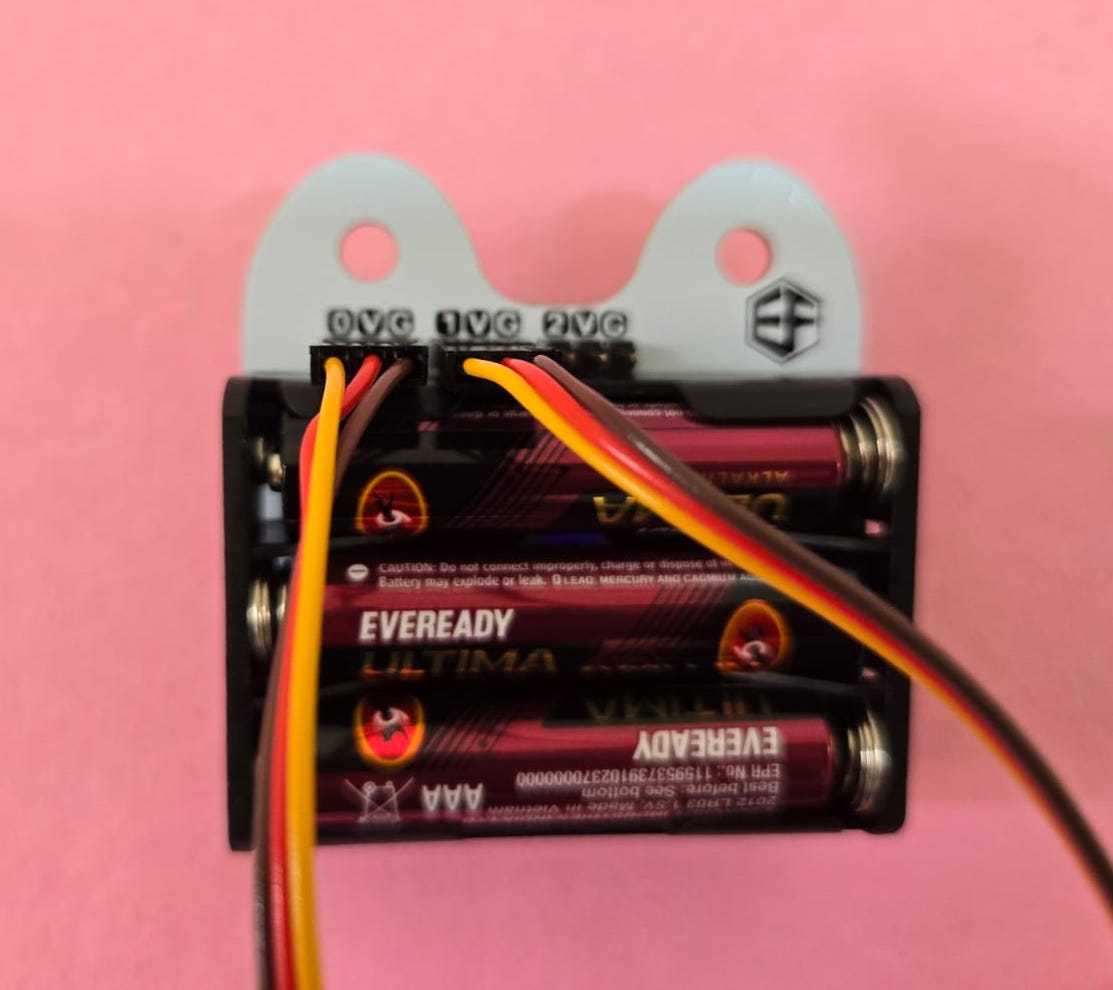
Connect the back leg servo motor to P1 on the expansion board.
Servo wire connection:
| Servo Wire | Connect To |
|---|---|
| Brown / Black | GND |
| Red | VCC |
| Orange / Yellow | P1 Signal |
Make sure the connector is firmly attached.
5. Connect the IR Sensor
Connect the IR sensor to P2 on the expansion board.
IR sensor connection:
| IR Sensor Pin | Connect To |
|---|---|
| Brown / Black | GND |
| Red | VCC |
| Orange / Yellow | P2 Signal |
The IR sensor receives commands from the IR remote control and sends them to the micro:bit through pin P2.
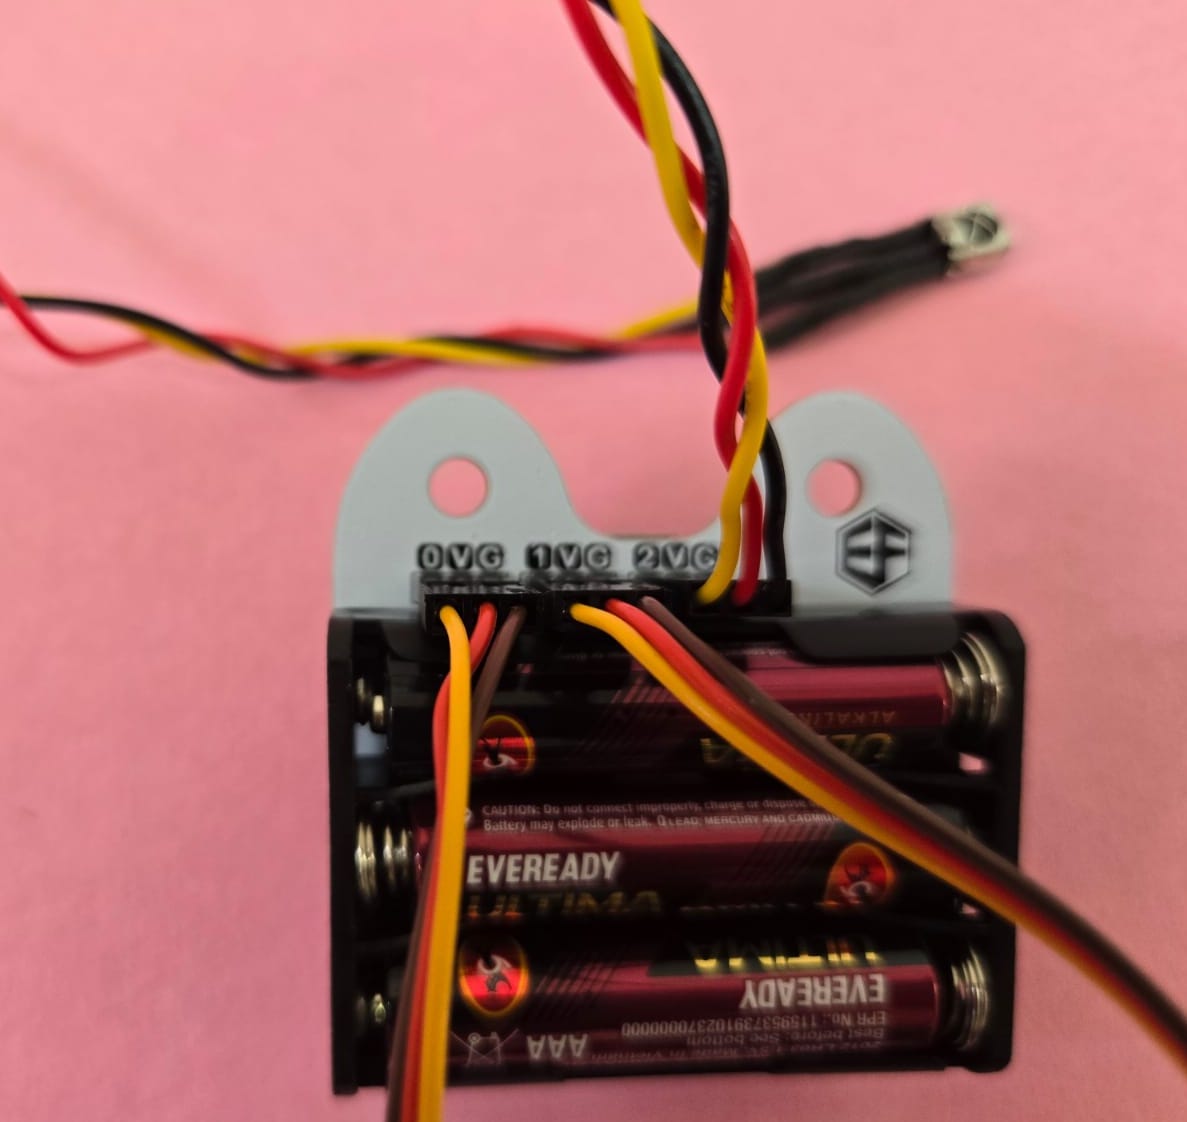
Final Connection Summary
| Component | Expansion Board Pin |
|---|---|
| Front leg servo motor | P0 |
| Back leg servo motor | P1 |
| IR sensor signal | P2 |
| Sensor / servo power | V / 3V |
| Ground | G / GND |
Brain Controller Installed on Robot Dog
The image below shows the micro:bit brain controller installed on the Robot Dog and secured using the Velcro band.
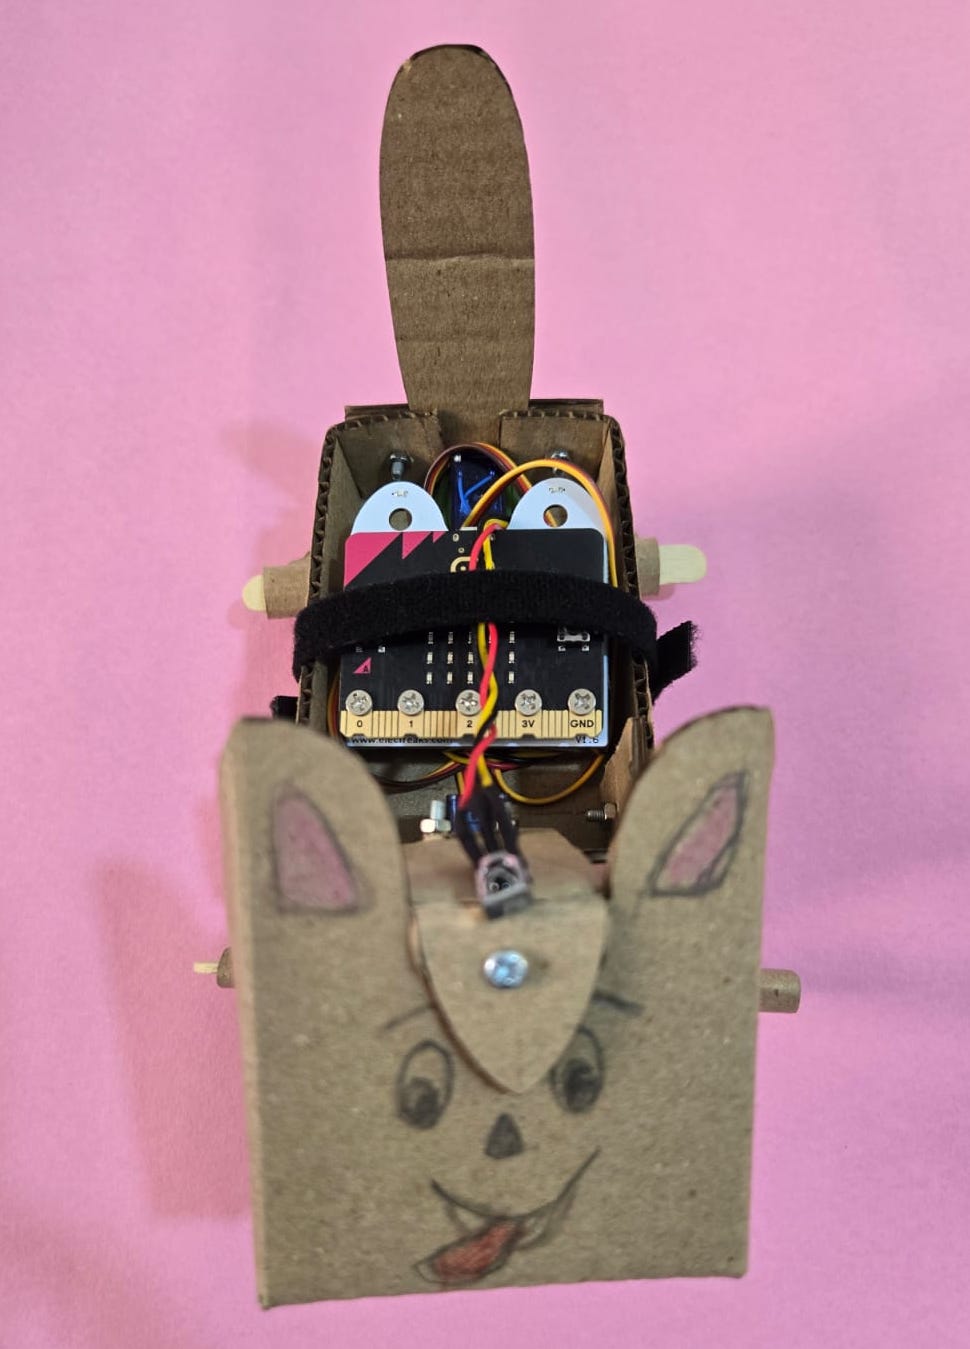
1. Place the Brain Controller on the Body
Place the micro:bit and expansion board assembly inside the Robot Dog body.
Position the board so that:
- The micro:bit buttons and display face forward.
- The board sits safely inside the body.
- The servo wires can easily reach the expansion board.
- The IR sensor wire can reach the top/front of the Robot Dog head as shown in the above image.
- The board does not touch the moving servo horns or legs.
2. Secure the Brain Using the Velcro Band
After placing the brain controller inside the Robot Dog body, use the Velcro band to hold it firmly in place.
Wrap the Velcro band around the Robot Dog body and the expansion board as shown in the image.
The Velcro band is important because it protects the brain controller from shaking or falling out while the Robot Dog is moving.
Final Check
Before powering the Robot Dog, check the following:
- Micro:bit is inserted in the correct direction.
- All five screws on the micro:bit terminals are tightened properly.
- Front leg servo is connected to P0.
- Back leg servo is connected to P1.
- IR sensor signal wire is connected to P2.
- VCC and GND connections are correct.
- Servo wires are not blocking the leg movement.
- Expansion board power switch is in the OFF position before connecting power.
Important Notes
- Do not reverse VCC and GND connections.
- Do not overtighten the screws on the micro:bit.
- Make sure the servo connectors are inserted in the correct direction.
- If the servo motor does not move, check the P0 and P1 connections.
- If the IR remote does not work, check the IR sensor connection on P2.
Completed Step
The micro:bit and expansion board are now assembled.
The Robot Dog electronics are ready for programming and testing.
If You Want to Program It Yourself Using MakeCode
Use this method if the robot program is not already programmed in the micro:bit.
1. Connect the Micro:bit
Connect the micro:bit to your computer using a USB cable.
Code
-
Open the above program in https://makecode.microbit.org/ by clicking on Edit Code and clicking on the arrow.
-
Click download and program the code.
Time to play
Now it’s time to have fun with your Robot Dog, test its movements, and experiment with it.